
Introduction
About 2 weeks ago I found out about the existence of an MCP (Model Context Protocol) server for BloodHound that allows us to integrate it with Claude. Below I share the publications I read on the topic:
SpecterOps article: BloodHound MCP: One Year Later — What I Learned About MCPs, Models, and Context
GitHub Repository: BloodHound MCP - GitHub Repository
What is this?
The BloodHound MCP allows you to query your Active Directory data in natural language directly from Claude Desktop. Instead of writing Cypher queries manually, you ask Claude things like “show me all Domain Admins” or “find kerberoastable users.”
Prerequisites
- Claude Desktop (Pro plan)
- BloodHound Community Edition running locally
- Data already imported into BH CE (output from RustHound or bloodhound-python)
- Git or GitHub access to download the repo
Worth mentioning that I have also seen colleagues use it with other LLMs, so I will be researching further and sharing anything interesting I find.
Implementation
Step 1: Clone the repository
git clone https://github.com/mwnickerson/bloodhound_mcp.git
cd bloodhound_mcp
Step 2: Generate the API Token in BH CE
In the BloodHound UI:
My Profile → Authentication : Api Key Management → Create Token
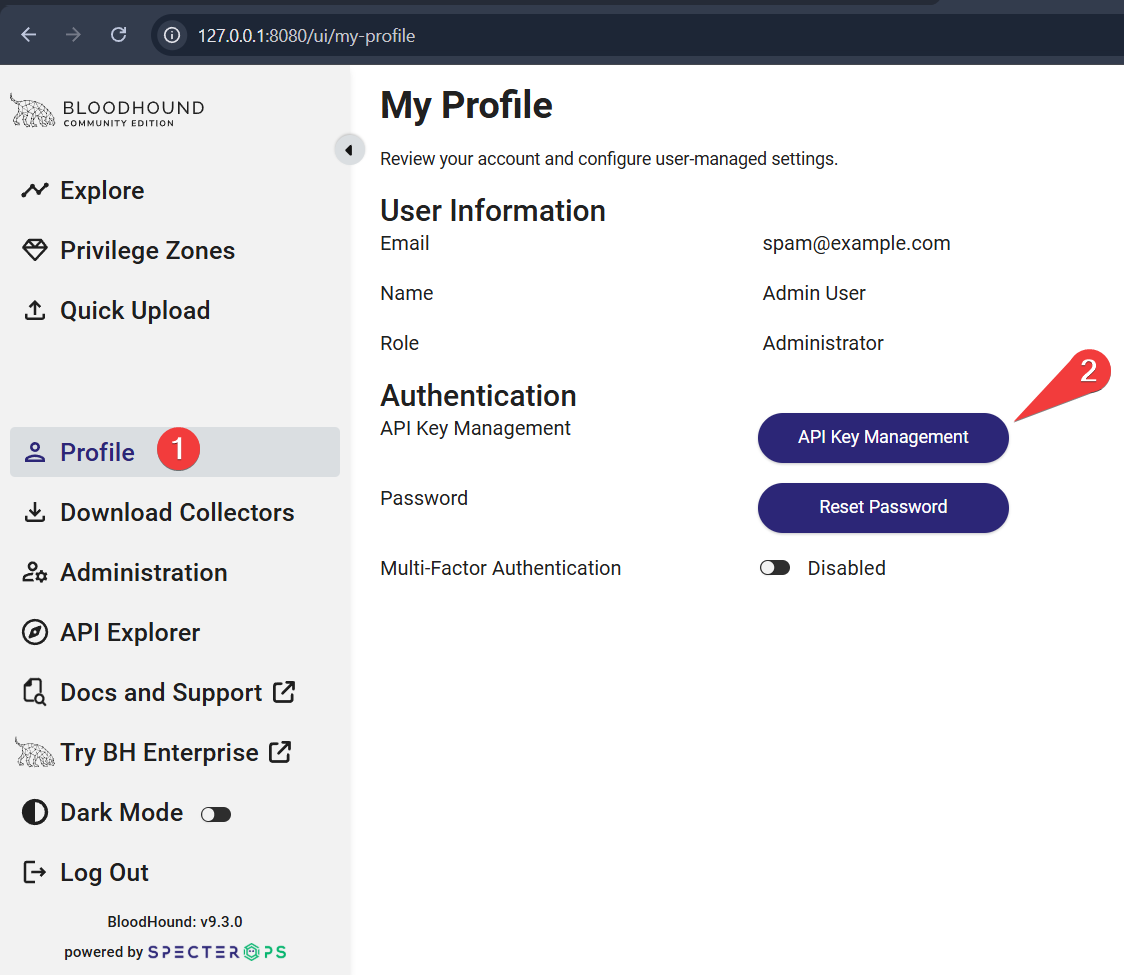
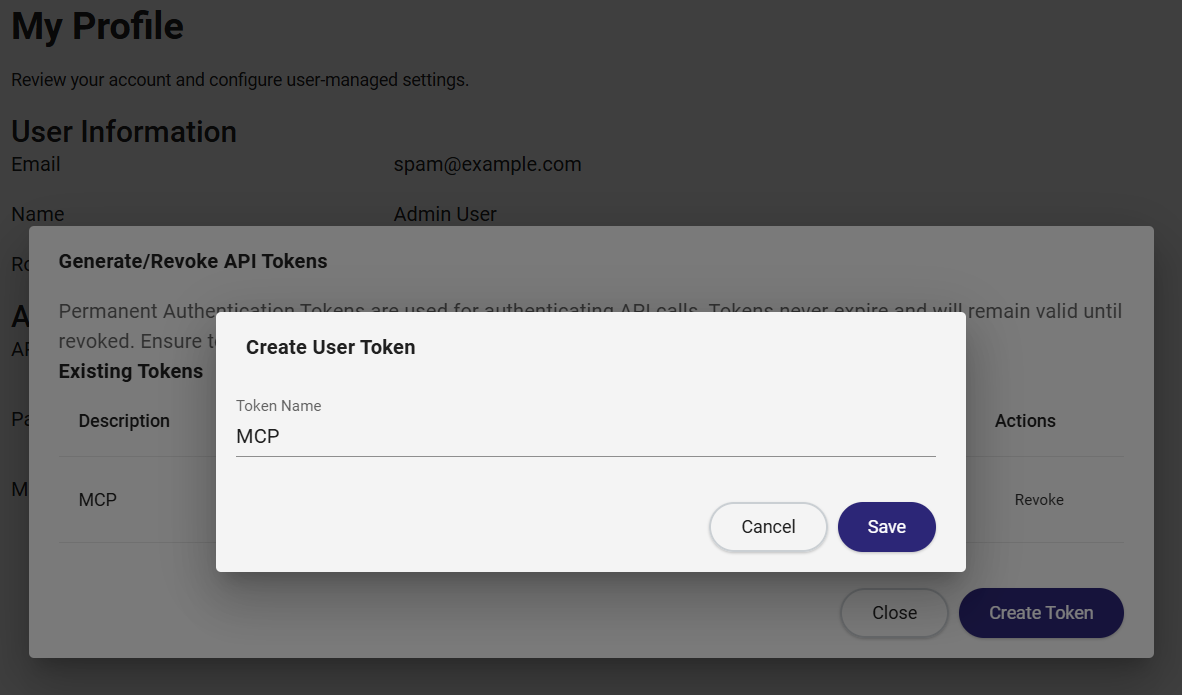
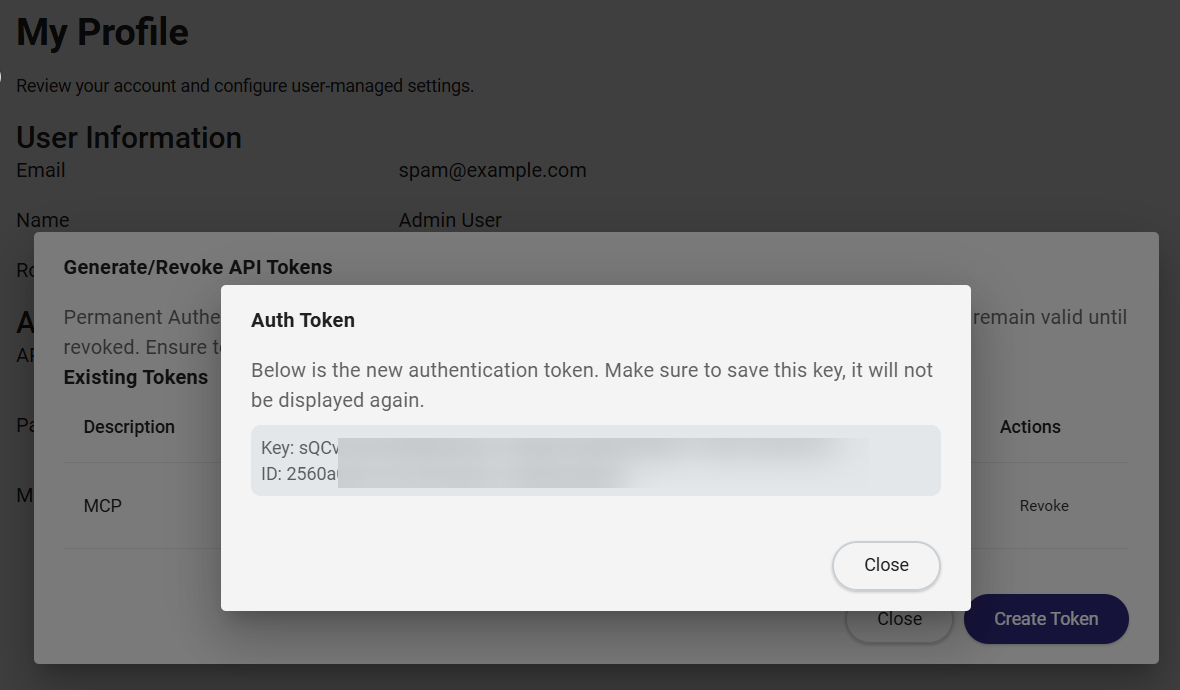
Save the KEY & ID values.
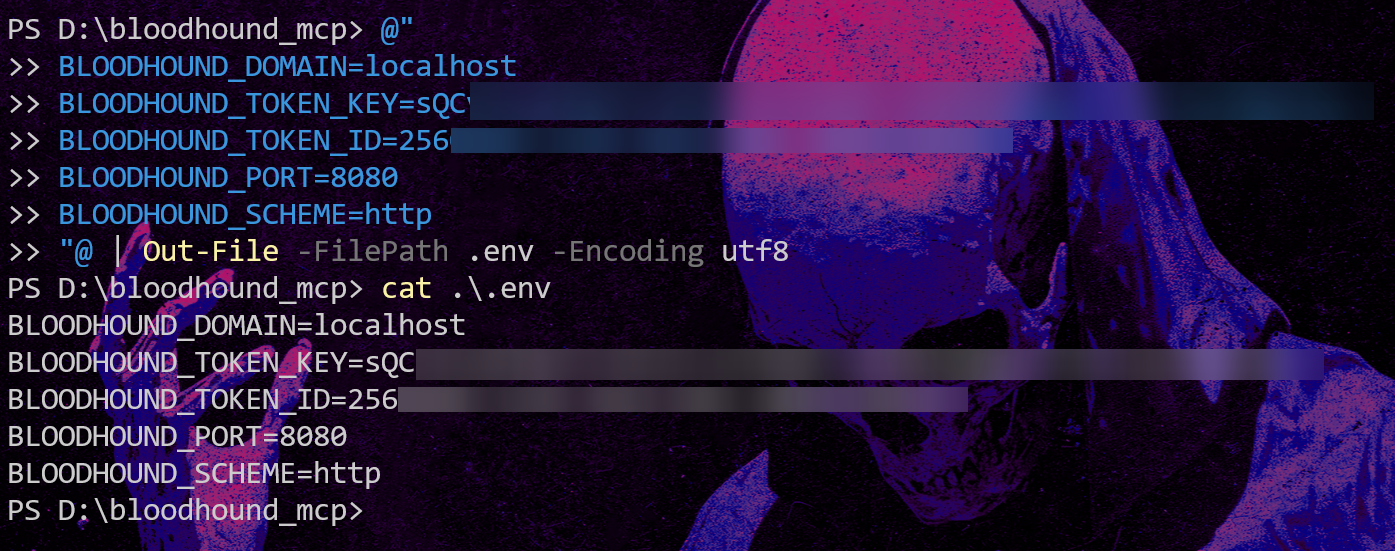
Step 3: Create the .env file
Inside the cloned repository folder, create a .env file:
@"
BLOODHOUND_DOMAIN=localhost
BLOODHOUND_TOKEN_KEY=your-token-key-here
BLOODHOUND_TOKEN_ID=your-token-id-here
BLOODHOUND_PORT=8080
BLOODHOUND_SCHEME=http
"@ | Out-File -FilePath .env -Encoding utf8
Fill in the values generated in Step 2.
Step 4: Install uv
On PowerShell:
powershell -ExecutionPolicy ByPass -c "irm https://astral.sh/uv/install.ps1 | iex"
On Linux:
curl -LsSf https://astral.sh/uv/install.sh | sh
With uv installed, we can now proceed to integrate the BloodHound MCP with Claude Desktop.
Step 5: Configure Claude Desktop
Open Claude Desktop:
Settings → Developer → Edit Config
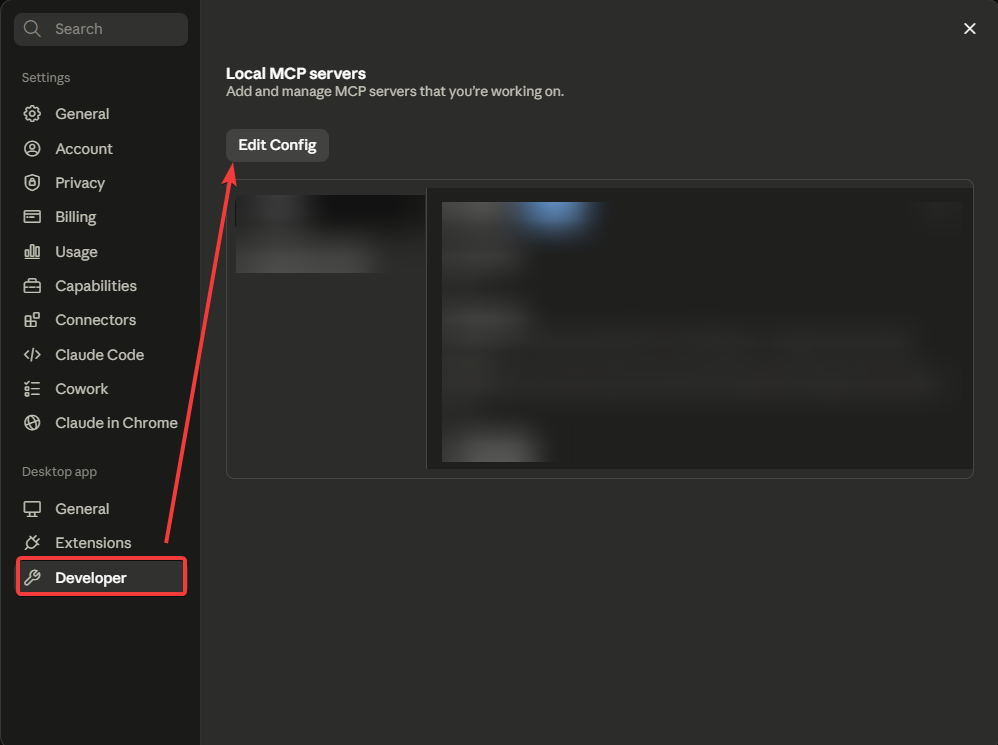
This will open the configuration files. The one we need to modify is claude_desktop_config.json — add the following:
{
  "mcpServers": {
    "bloodhound_mcp": {
      "command": "uv",
      "args": [
        "--directory",
        "D:\\bloodhound_mcp",
        "run",
        "main.py"
      ]
    }
  }
}
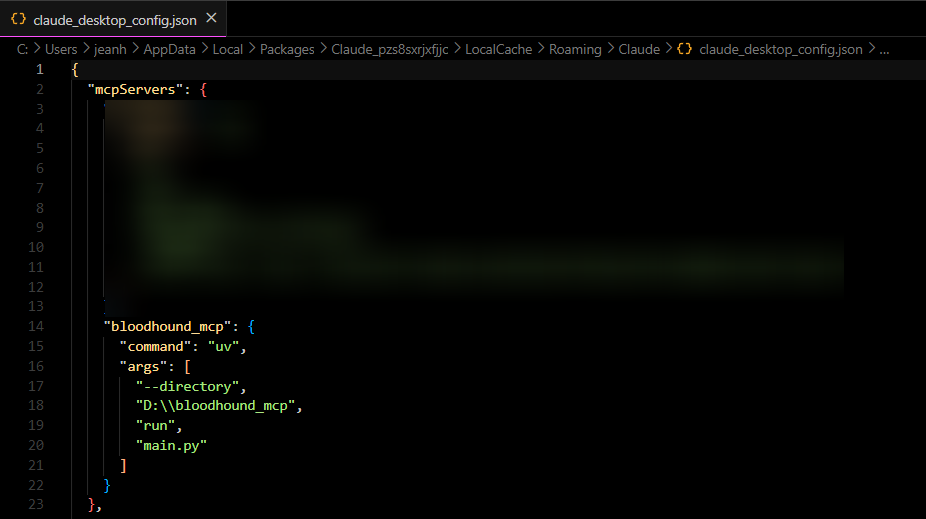
Make sure the
argspath points to the correct directory where you cloned the repository.
Step 6: Restart Claude Desktop
Close Claude Desktop completely from the system tray (right-click → Quit, not just the X) and reopen it.
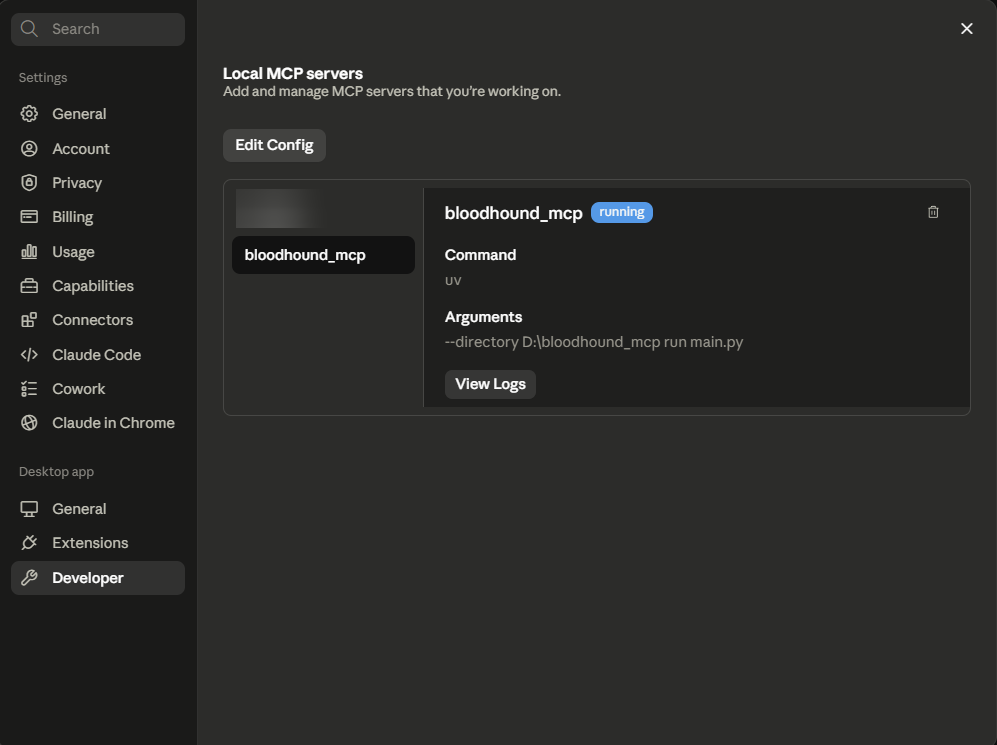
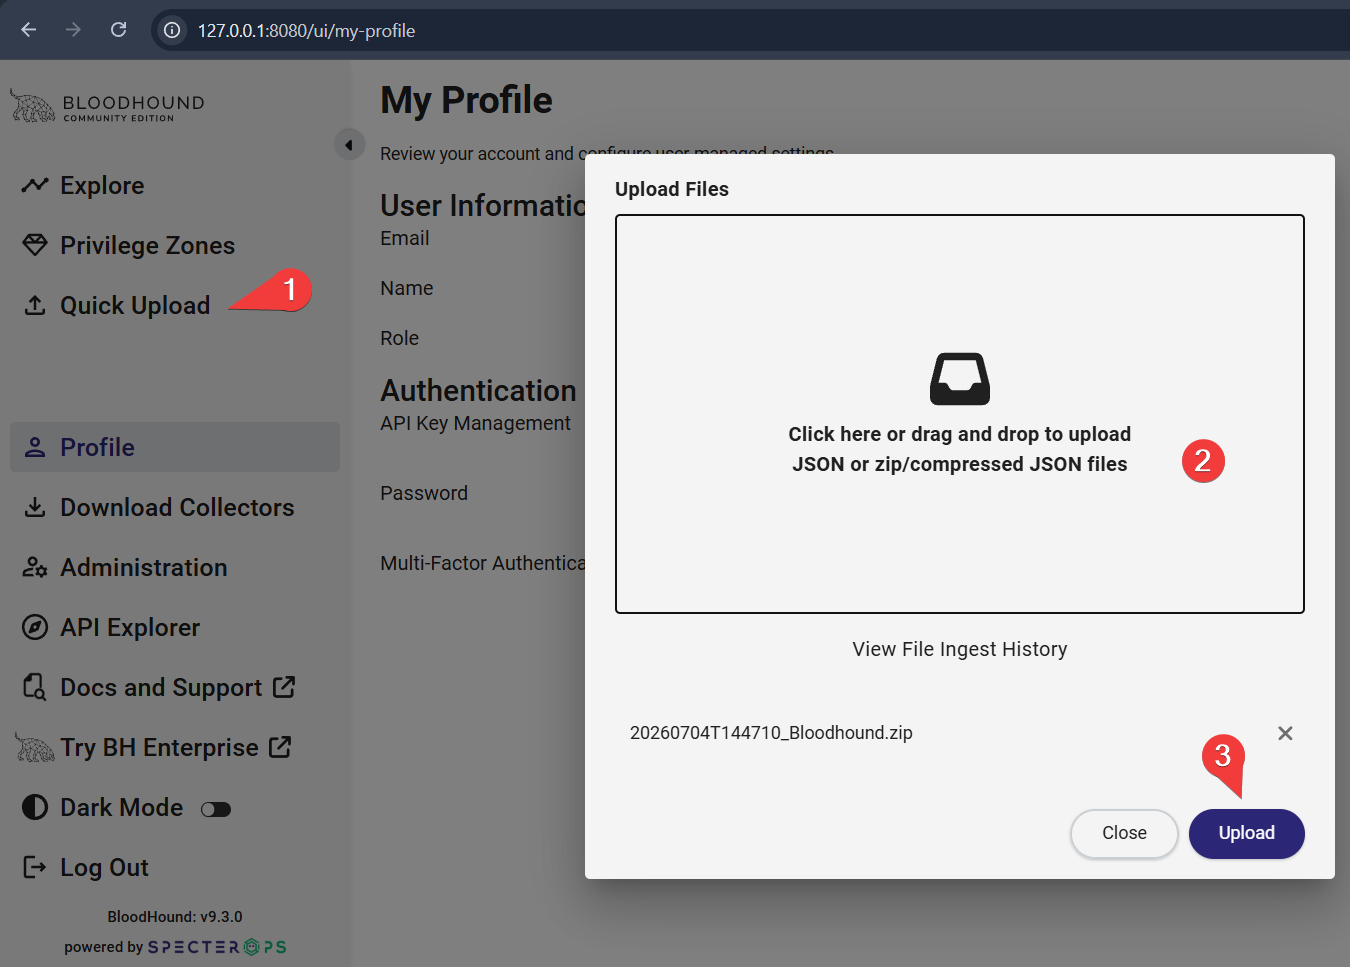
Functional Tests
Now it is time to test it. The first thing to do is upload a .zip generated by any collector (RustHound, SharpHound, etc.):
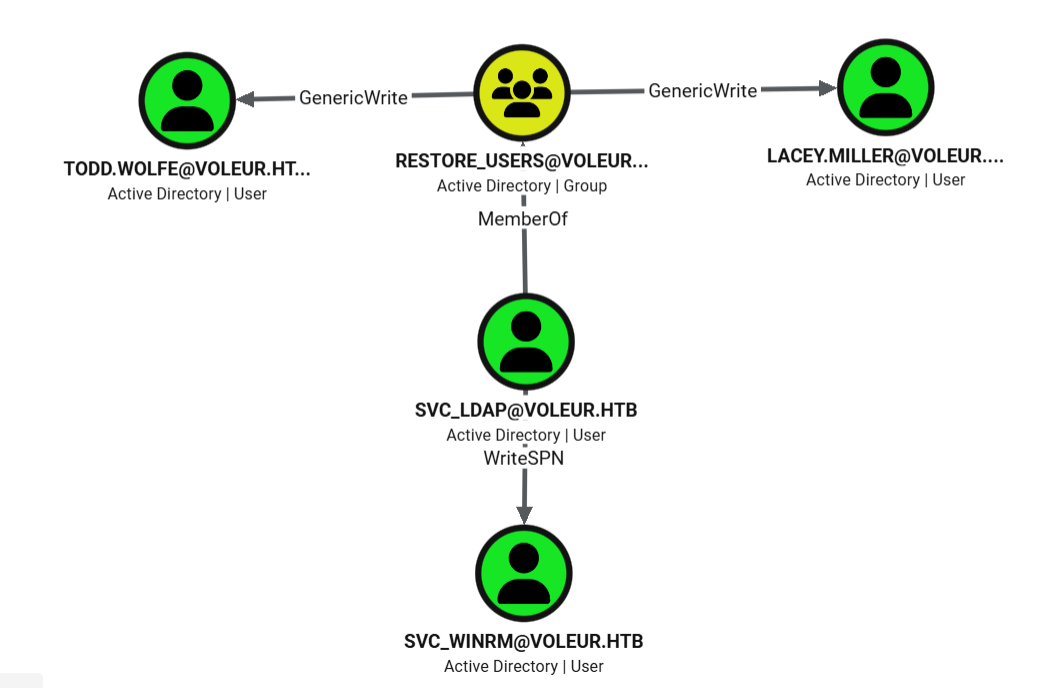
Now, from Claude Desktop:
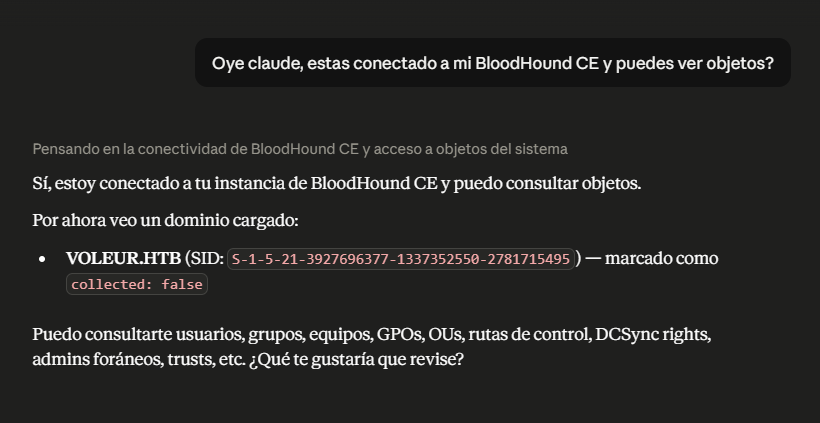
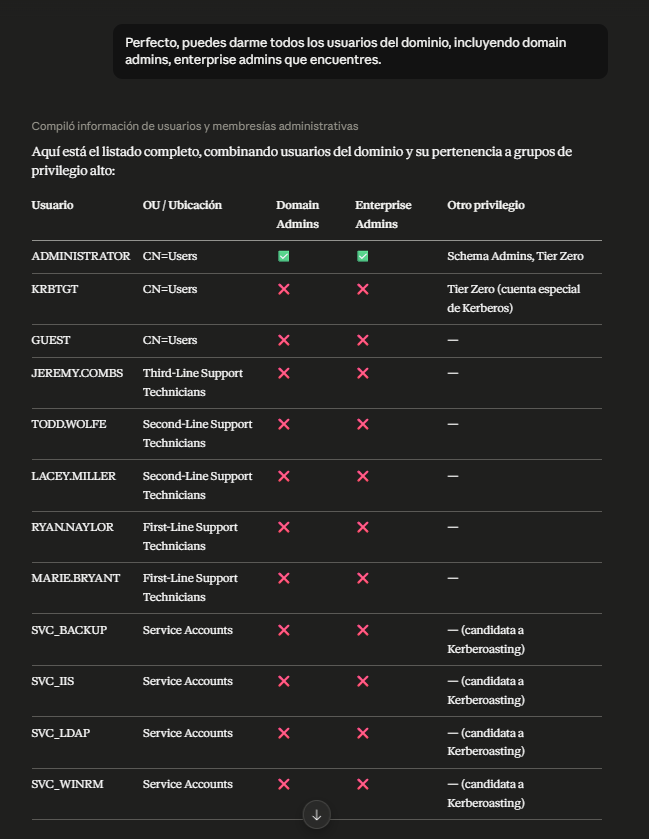
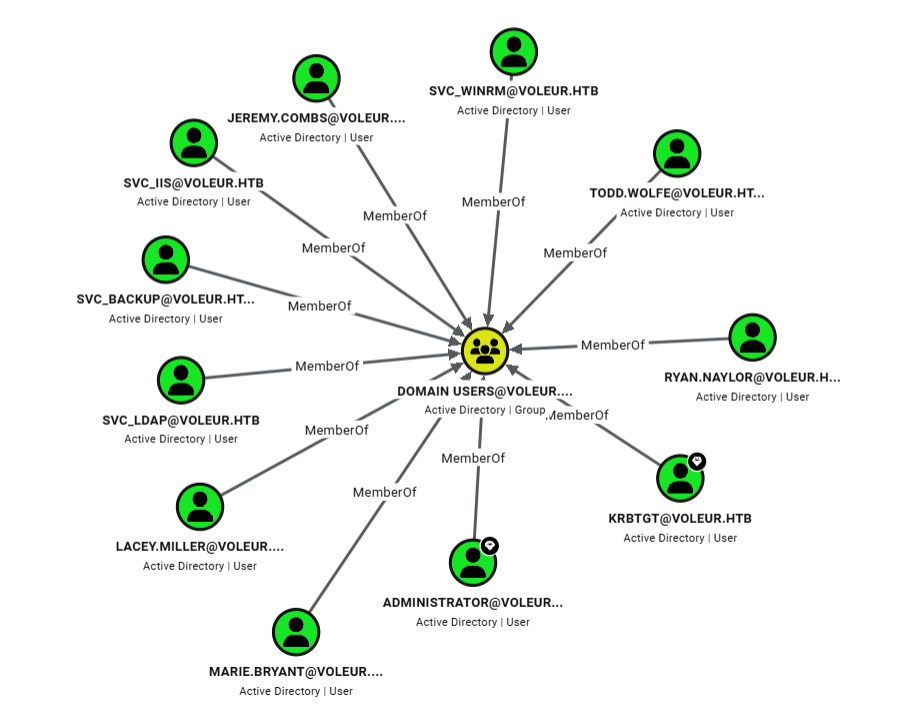
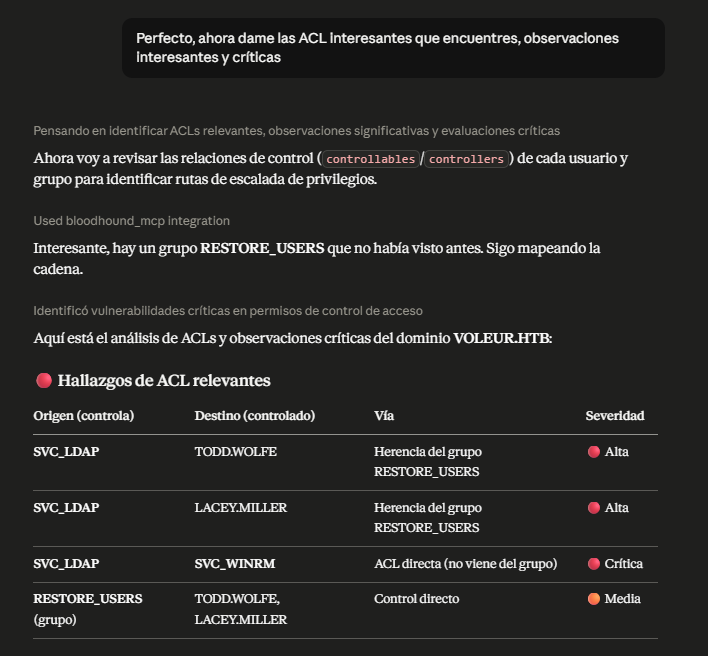
Conclusions
The integration of BloodHound MCP with Claude Desktop makes a significant difference in the speed at which we can interrogate Neo4j during an Active Directory audit:
- Cypher Abstraction: Eliminates the need to memorize complex Cypher queries for quick lookups.
- Speed and Convenience: Querying attack paths or critical accounts in natural language dramatically accelerates the analysis phase.
- Professional Judgment: Remember that AI is a co-pilot. Always manually verify the paths suggested by Claude to rule out hallucinations or misinterpretations.
References
Thanks for reading — I hope this is useful. If you have any questions, suggestions, corrections, or simply want to share something about this topic, my socials are on this blog — feel free to reach out.
Closing quote:
“We can only see a short distance ahead, but we can see plenty there that needs to be done.”
— Alan Turing